Now is the Time of Year to Check Pivot Performance

Derek M. Heeren1, Associate Professor and Water for Food Global Institute Faculty Fellow
Steven R. Melvin2, Extension Educator
Aaron Nygren3, Associate Extension Educator
Eric Wilkening1, Undergraduate Research Assistant
1 Department of Biological Systems Engineering, University of Nebraska-Lincoln
2 Southeast District, Nebraska Extension, University of Nebraska-Lincoln
3 Northeast District, Nebraska Extension, University of Nebraska-Lincoln
When a center pivot is running below the designed operating pressure, decreases in water application uniformity can occur, which, in turn, decrease yields. Pressure data has been analyzed in an ongoing study from 66 pivots across Nebraska with either AgSense FieldCommander or Lindsay FieldNET remote monitoring equipment. Of these systems, 34 pivots (52%) are operating below their pressure requirement for at least 5% of the time. This indicates that low pressure is likely to be a more common problem than what we realize. While low operating pressure may occur occasionally throughout an irrigation event (e.g. due to topography), frequent low pressure can be attributed to either leaks developing along the system or low well capacity relative to the irrigation system.
Therefore, one of the key things to look for in an irrigation system evaluation is the pressure. After you turn the pivot on, be sure to let it run for a while (5-15 min) until the pressure becomes steady. It is ideal to check the pressure at multiple locations along the pivot lateral. If this is not feasible, the next best option is the check the pressure at the location where it is likely to be the lowest. This is typically at the end of the pivot lateral (due to friction loss) and at a relatively high elevation in the field.
Check to see whether the pressure matches the design pressure (the end gun should be on during the pressure checks). The sprinkler chart will indicate the location the design pressure is to be checked. It is usually at the base or the top of the pivot point. Alternatively, if the pivot has regulators, the pressure should be at least 5 psi above the pressure rating of the regulators when checking it at the outer end of the pivot when it is on the highest point of the field. If the pressure is lower than usual, it may indicate that there is a leak in the system or that the pump is not pumping sufficient water/pressure for the current nozzle package. If the pressure is higher than usual, there may be pluged sprinklers or the system is set up improperly, which can increase energy costs. One quick and low cost method to correct low pressure is to change the sprinkler orifices. All that needs to be done is to have your dealer run a new sprinkler chart with a lower flow rate, buy a few smaller orifices to put in by the pivot point and move the rest of the orifices out a few sprinklers on the machine. If the pressure is too high, do the opposite.
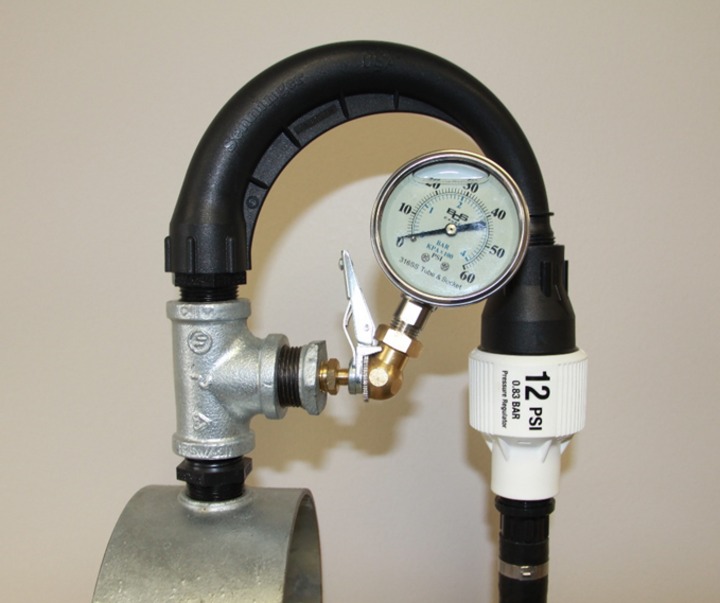
A good strategy to measure pressure on pivots is to install a Schrader valve instead of a pressure gauge. Get the ones that have ¼” NPT male thread and install it into the port where the gauge was before. Then attach an air chuck with a grip to a high quality gauge that can be moved between pivots. Then the pressure can be checked with just one gauge that can be stored inside where it is protected from the weather. All of these parts can be purchased at the local farm supply store.
Schrader valves can also be installed at the distal end of the machine, which is the most critical point to check the pressure.
A second key thing to check for is the flow rate. Again, the flow rate can be compared to the design flow rate. If your flow rate is lower than usual, and the pressure is lower than usual, this may indicate a problem with the well. Possibilities include the screen (clogged or crusted over) and declining water table or the pump needs to be turning faster.
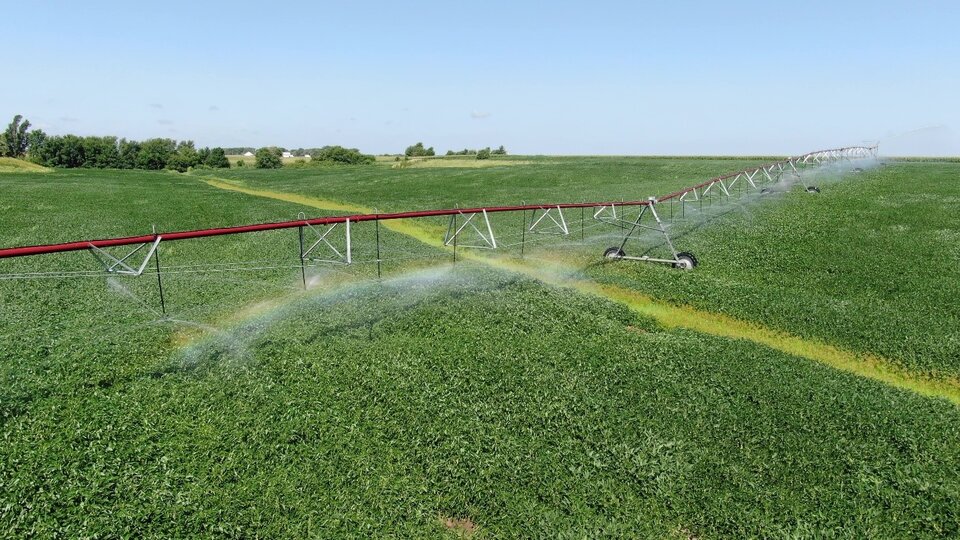
[SM1] . One of the easiest ways to check sprinklers is to get back a little ways from the pivot and get at an angle where you can see the sun light gleaming off the water. From this vantage point closely look at each sprinkler, as well as the overall pattern looking for any inconsistencies or leaks, you can use binoculars if it is helpful. The overall pattern should show less water closer to the pivot point and gradually increasing toward the out end of the pivot. Visually look for leaks or any nozzles that are plugged. Check to make sure that any rotating parts (e.g. sprinkler deflection pad) are actually rotating Look to see if any runoff is occurring, which is most likely to be a problem on the last span and/or on a hillslope. If available, utilizing a drone or UAS opens up new ways to do this “walk-by” quickly and may allow you to more easily check system operation in parts of the field that are not easily accessible.
Other ideas for a system evaluation that take more time but are good to do occasionally include: 1) check nozzle colors to make sure they match the nozzle chart, 2) do a catch can test on level ground to evaluate the uniformity of the sprinkler package and the irrigation application efficiency, and 3) check the performance of the pumping plant, e.g. with the Nebraska Pumping Plant Performance Criteria.
For more information, contact your local extension educator or irrigation dealer. Also, the articles below provide more depth on specific components of a system evaluation:
- Nebraska Extension: Irrigation System Evaluation
- Checklist for Winterizing Your Center Pivot
- Sprinkler Irrigation System Maintenance for Improved Uniformity and Application Efficiency
- Problems Regarding Operating Pressure & Uniformity
- Center Pivot Irrigation Handbook

Figure1. Schader valves can be installed at the distal end of the machine, which is the most critical point to check the pressure. In this instance, the pressure should be a minimum of 17 psi (12 psi + 5 psi over the regulator design pressure).
This article was reviewed by Aaron Nygren & Eric Wilkening